WiseCleaner Think Tank

Encounter difficult computer problems?
All about maintenance and optimization of your Windows System.

Home > Think Tank > How to Fix Wi-Fi Not Showing Up on Windows 11

How to Fix Wi-Fi Not Showing Up on Windows 11

Jan 22, 2025

In today's computing era, connecting to the Internet is critical. For most Windows computers, a Wi-Fi connection is the typical source of the Internet. But what if your Wi-Fi doesn't show up on Windows 11? This issue can be frustrating, but it’s often caused by simple configuration problems, outdated drivers, or hardware glitches. Here’s a step-by-step guide to help you resolve the issue and get back online.

Fix 1. Verify Basic Settings

Before diving into advanced fixes, ensure the basics are in order:

  • Check the Wi-Fi Switch: Some laptops have a physical Wi-Fi switch or function key (like Fn + F5). Make sure it's turned on.
  • Airplane Mode: Ensure Airplane Mode is disabled by pressing Win + A and toggling it off.
  • Wi-Fi Enabled: Click on the network icon in the taskbar and then ensure that Wi-Fi is toggled on.

Fix 2. Run the Network Troubleshooter

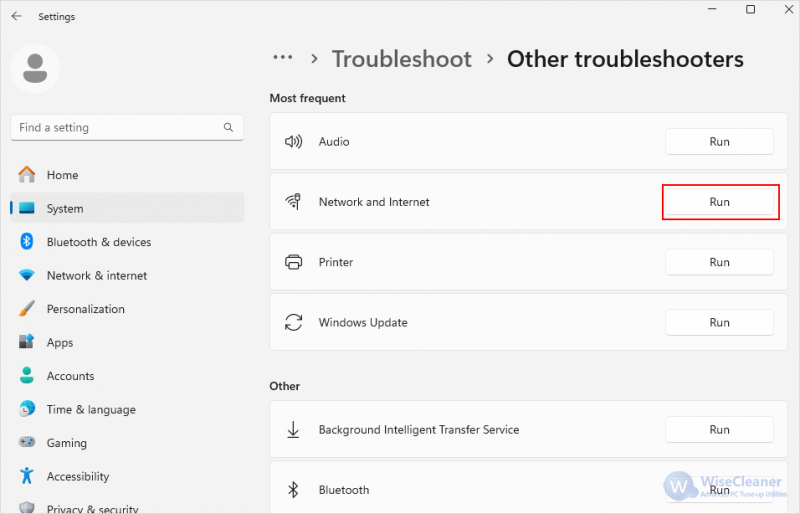
Windows 11 has a built-in troubleshooter that can automatically detect and resolve common issues.

  • Go to Settings > System > Troubleshoot > Other troubleshooters.
  • Under Most frequent, click Run next to Internet Connections and follow the prompts.
  • Wait while the Windows Network Diagnostic analyzes the network connection. If prompted, follow the instructions to resolve the issue.
Run the Network Troubleshooter

Fix 3. Update or Reinstall your Network Adapter

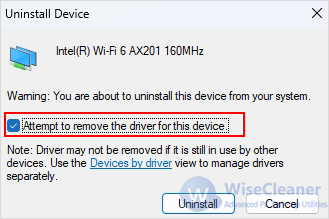
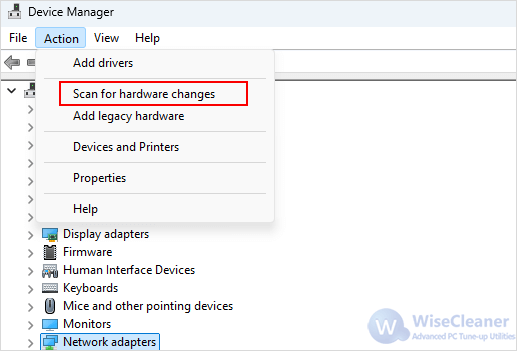
Outdated or corrupt drivers are a common cause of Wi-Fi issues.

  • Press Windows + X and select Device Manager.
  • Expand Network adapters, right-click your Wi-Fi adapter, and select Update driver.
  • Choose Search automatically for drivers.
  • To reinstall the adapter, select Uninstall device
Update or Reinstall your Network Adapter
  • Select the Attempt to remove the driver for this device box and click Uninstall.
Attempt to remove the driver for this device
  • In the Device Manager window, select Network adapters, select Action, and then select Scan for hardware changes.
Scan for hardware changes
  • After the network adapter name displays, close Device Manager, and then restart the computer.

Fix 4. Check WLAN AutoConfig Service

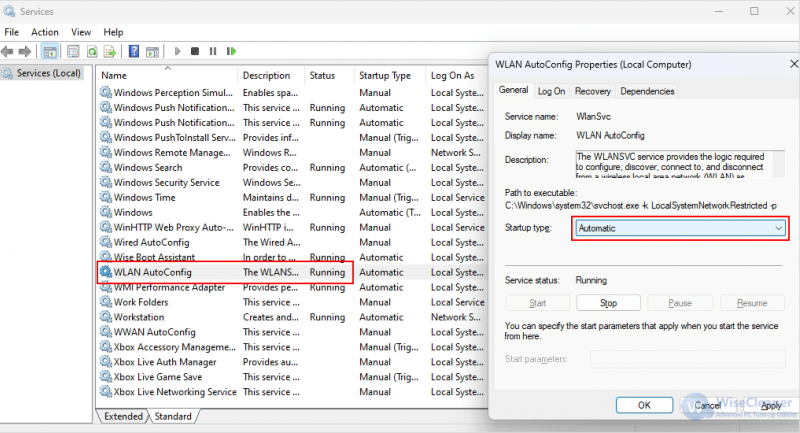
The WLAN AutoConfig service manages wireless connections. Ensure it’s running:

  • Press Win + R, type services.msc, and hit Enter.
  • Scroll down and find WLAN AutoConfig.
  • Double-click it, set the Startup type to Automatic.
  • Click Apply and OK.
Check WLAN AutoConfig Service

Fix 5. Flush DNS Cache and Reset TCP/IP

Network configuration issues can also cause Wi-Fi problems. Resetting TCP/IP and flushing the DNS cache can help:

  • Press Win + S, type cmd, right-click Command Prompt, and select Run as administrator.
  • Run the following commands one by one:

netsh winsock reset

netsh int ip reset

ipconfig /release

ipconfig /flushdns

ipconfig /renew

  • Restart your computer and check if the Wi-Fi is now visible.
Flush DNS Cache and Reset TCP/IP

Conclusion

Wi-Fi issues can disrupt your workflow, but these troubleshooting steps should help resolve the problem of networks not showing up on Windows 11. If all else fails, consider seeking professional assistance or contacting your device manufacturer.

Latest
Understanding Windows Power Plans: Balanced, Battery Saver, High Performance, and Ultimate Performance10 Hidden iPhone Features and Tricks You May Not Know About How to Install ADMX and ADML for Microsoft Edge Group Policy Management
Read more >>
Recommend
Understanding Windows Power Plans: Balanced, Battery Saver, High Performance, and Ultimate PerformanceWindows Update Delivery Optimization: How It Works & How to Disable It (2025 Guide)Should I enable or disable Trim of SSD?
Read more >>
Hottest
How to Install a macOS in VMware Workstation PRO 17How to Enable Task Manager Option in Taskbar Menu on Windows 11How to Fix Office Application Error 0xc0000142
Read more >>