WiseCleaner Think Tank
Encounter difficult computer problems?
All about maintenance and optimization of your Windows System.
Jan 17, 2023
VMware Workstation Pro is a hosted hypervisor that runs on x64 versions of Windows systems. We can use it to set up virtual machines on a single physical machine and use them simultaneously along with the host machine.
Setting up a Windows system in VMware Workstation Pro is very easy, whether it's the early Windows XP or the latest Windows 11, except the macOS. In this article, I will show you step by step how to install macOS in VMware Workstation 17.
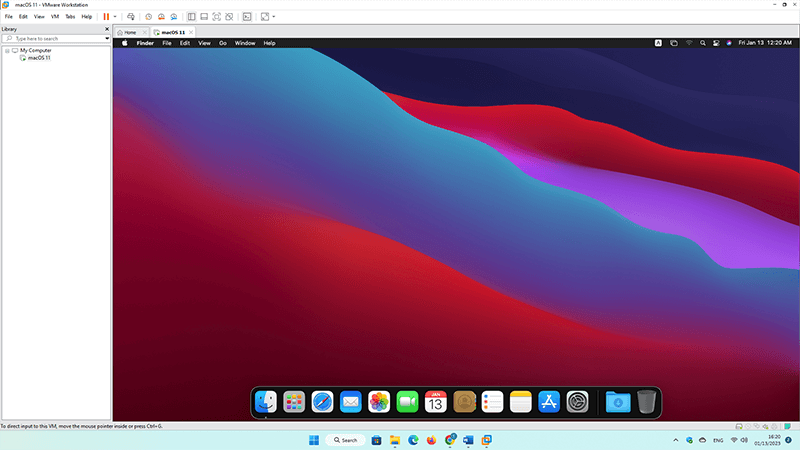
To install macOS in VMware Workstation, we need to prepare the following tools.
Please download VMware Workstation Pro 17 from the official website, then double-click the installation file to install it. If you have done the installation, please just skip this step.
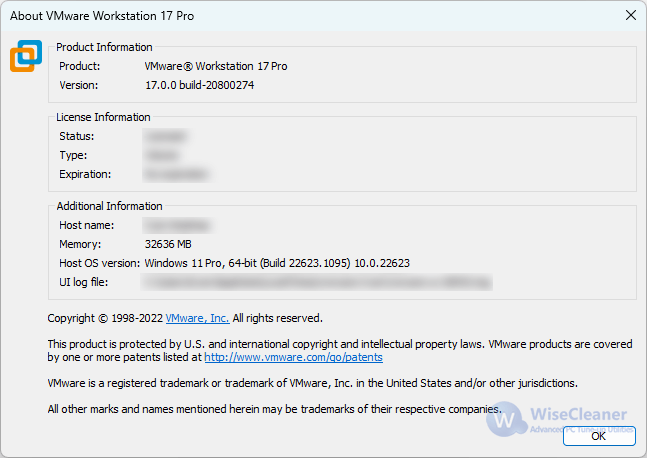
VMware Workstation Pro does not support installing macOS by default, we need to install the compatibility path to unlock it. Before installing the compatibility path, please close VMware Workstation. Here, I take Unlocker 4.2.4 as a sample.
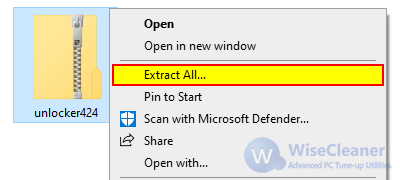
Unlocker 4.2.4 is a compressed (zipped) folder. Right-click on it and select Extract All…
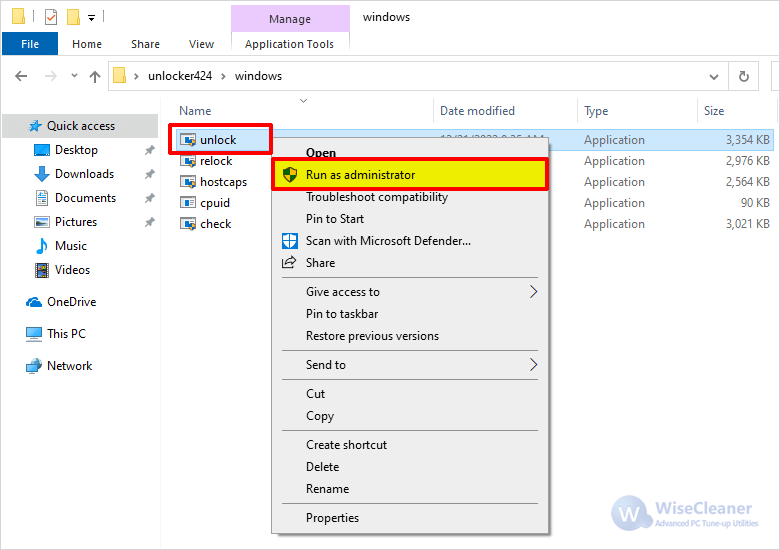
Then open the folder windows and find the file unlock.exe. Right-click on it and select Run as administrator.
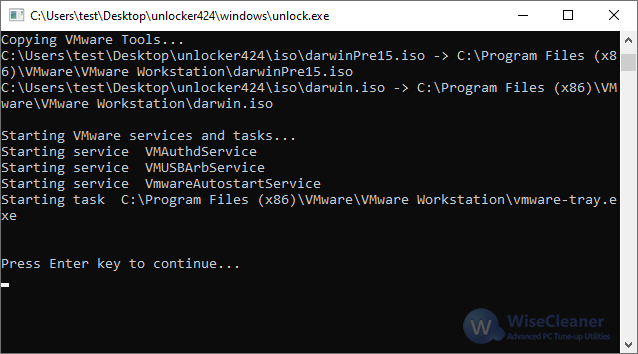
It will open the Command Prompt window and install the compatibility patch automatically. When you see "Press Enter key to continue…", that means the installation is completed and you can press Enter key to close this window.
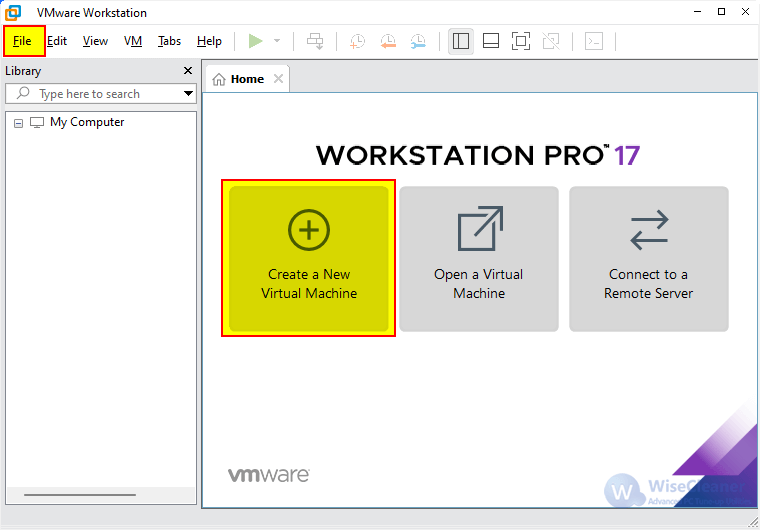
Double-click the shortcut of VMware Workstation on the Desktop, then click the button Create a New Virtual Machine on the right. Or you can click File on the top of the window and click New Virtual Machine. The shortcut key to create a new virtual machine is CTRL + N.
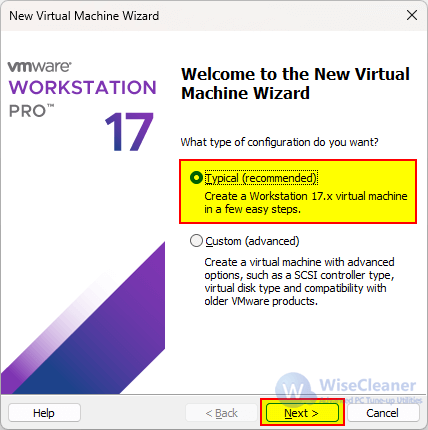
In the New Virtual Machine Wizard window, select Typical (recommended) and click Next.
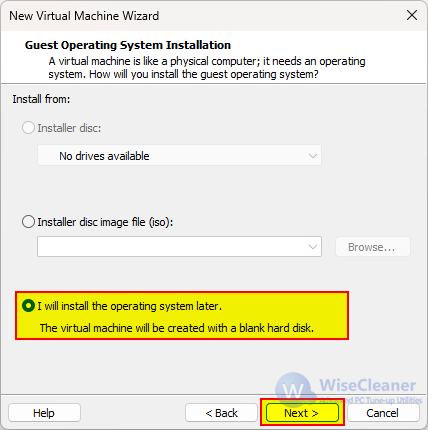
You will see the following 3 options. Please select the third one I will install the operating system later. Then click Next.
Note: VMware Workstation Pro can detect the operating system type from a disc or the disc image file and automatically apply the correct configurations, excluding macOS. If you try to do this, you will receive an error message "Could not detect which operating system is in this disc image. You will need to specify which operating system will be installed".
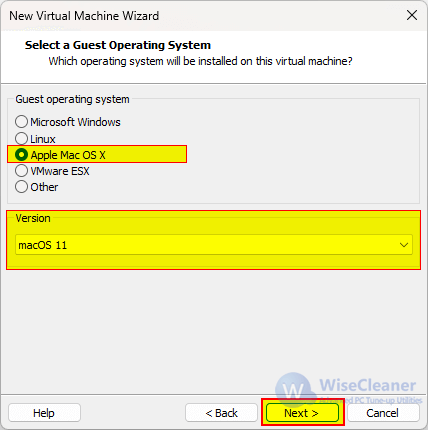
Select Apple Mac OS X, then click the drop-down menu in the Version area and select the macOS version you want to install. Then click Next.
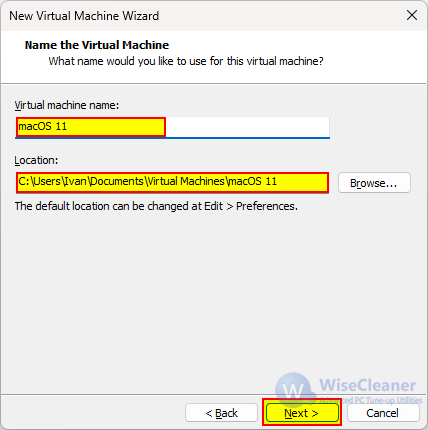
Customize the name of the virtual machine and the location to save the virtual machine files. Then click Next.
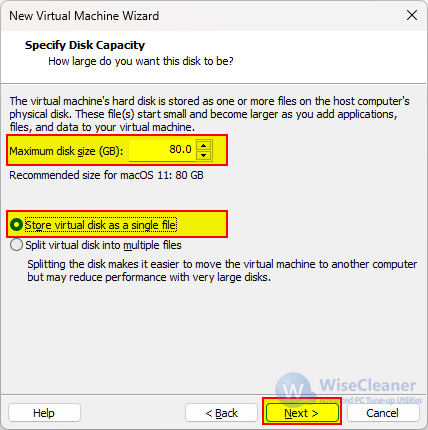
Set up the virtual machine’s hard disk size. The default value of 80GB is good enough. If you don't need to move the virtual machine to another computer, the first option Store virtual disk as a single file is highly recommended. Then click Next.
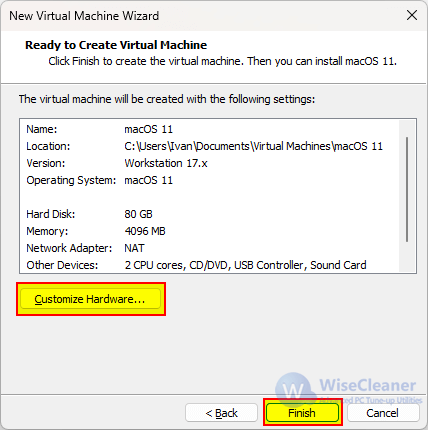
Click the Customize Hardware button to change hardware settings for macOS.
Select CD/DVD (SATA) on the left, then select Use ISO image file on the right and click the Browser button to select your macOS image file. If your physical computer has 16GB or above physical memory, setting up 8GB for the virtual machine is recommended.
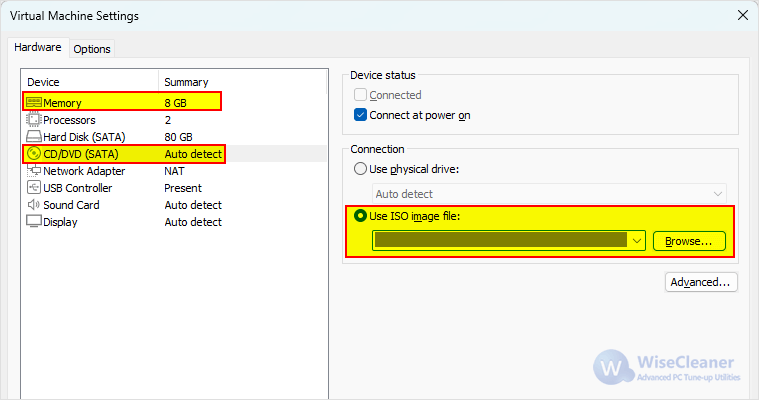
Then click OK to save changes, and click Finish to complete the wizard setting.
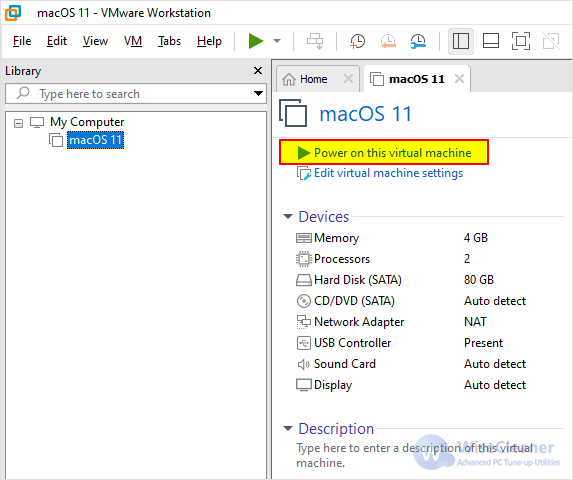
After clicking the Finish button, all the settings are completed, and then we will see the dashboard of the newly created virtual machine macOS. Click Power on this virtual machine.
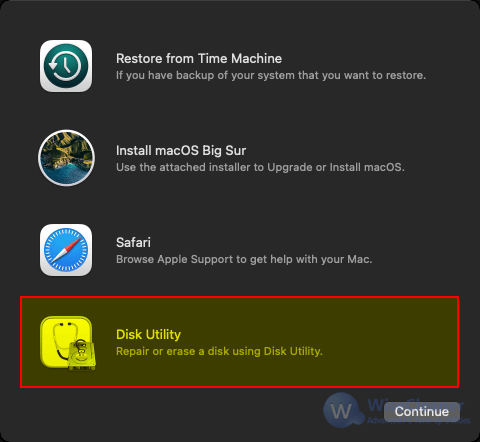
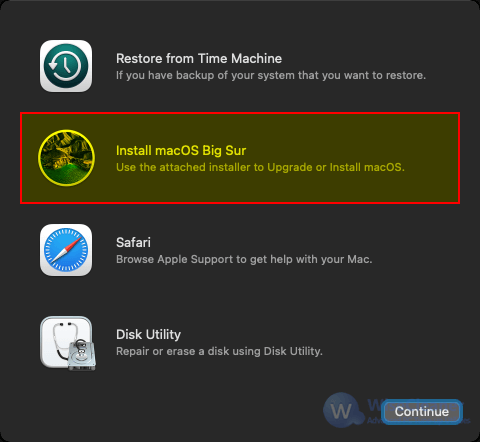
After selecting your macOS language, you will see below four options. Please click the fourth one Disk Utility. Because macOS cannot recognize the newly added hard disk, we need to format it.
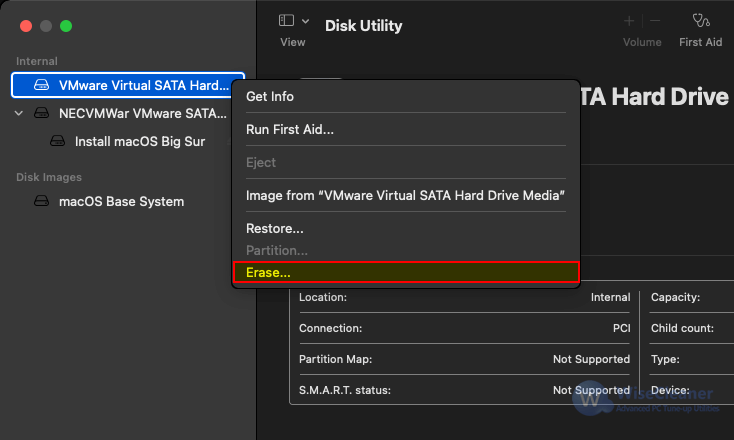
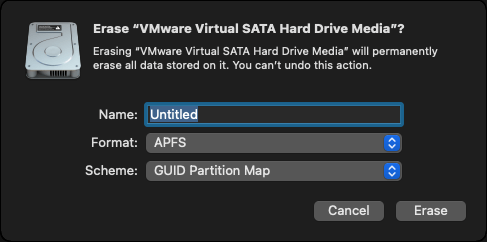
Right-click on VMware Virtual SATA Hard Drive Media on the left, and select Erase.
No need to change anything, just click the button Erase.
After the disk erasing is completed, it will return to the interface of the previous step. Now, you can click the second option Install macOS.
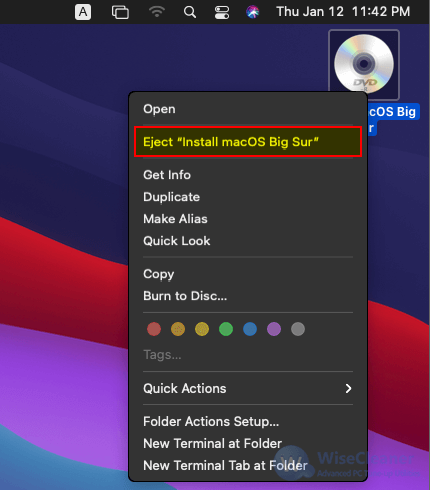
After the installation is complete, the system will automatically restart. After entering the desktop, right-click on the DVD icon and select Eject.
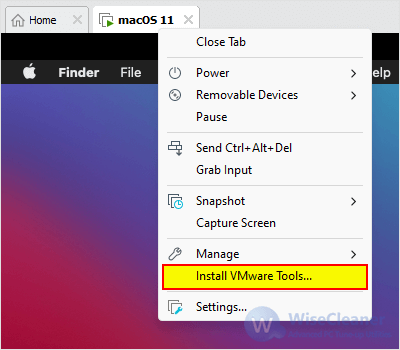
Then right-click on the macOS tab and select Install VMware Tools.
At this point, all the installation is complete. You can experience the charm of macOS through VMware Workstation Pro on your Windows computer.
wisecleaner uses cookies to improve content and ensure you get the best experience on our website. Continue to browse our website agreeing to our privacy policy.
I Accept