WiseCleaner Think Tank
Encounter difficult computer problems?
All about maintenance and optimization of your Windows System.
Aug 21, 2024
Formatting a hard drive is an essential task that helps in preparing the drive for use, erasing existing data, or changing the file system. Whether you're setting up a new drive, repurposing an old one, or simply looking to start fresh, Windows 11 offers several easy methods to format your hard drive. This guide will walk you through each step of the process, ensuring your drive is ready for use.
This method is straightforward and ideal for users who prefer a graphical interface.
1. Press Win + E to open File Explorer.
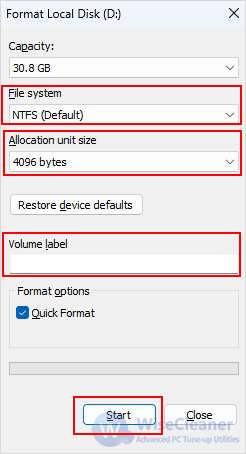
2. In the left sidebar, find the drive you want to format under This PC. Right-click on it and select Format from the context menu.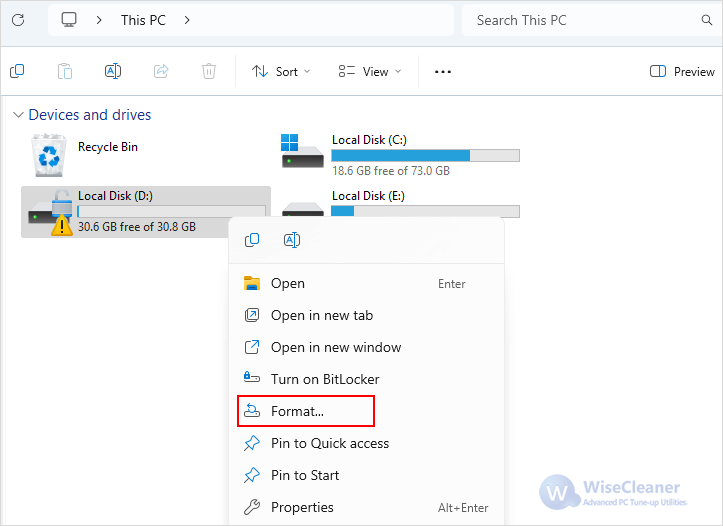
The Settings app simplifies many tasks, including drive management. Here’s how.
1. Press Win + I to open the Settings app.
2. In the Settings window, click on System in the left sidebar then select Storage from the list of options.
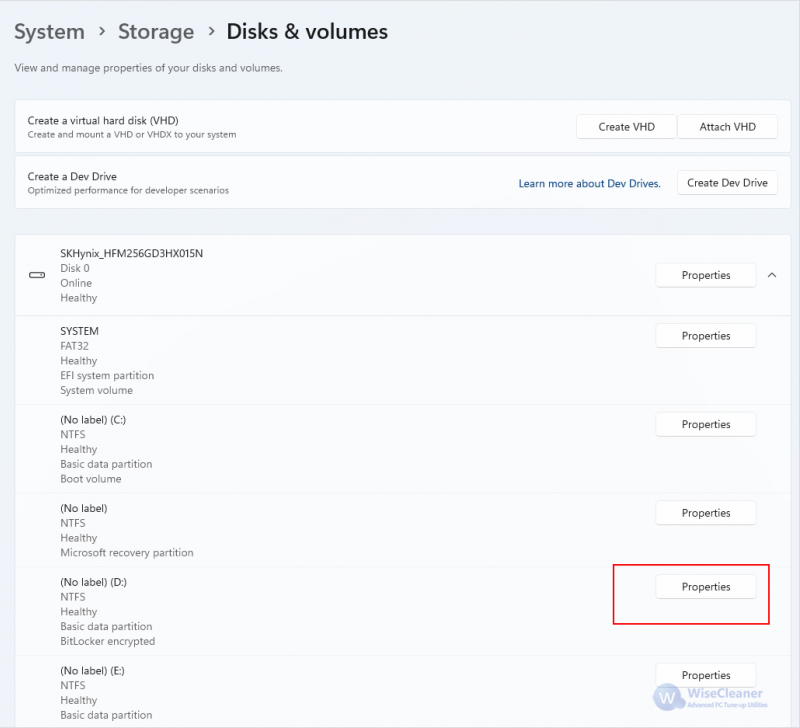
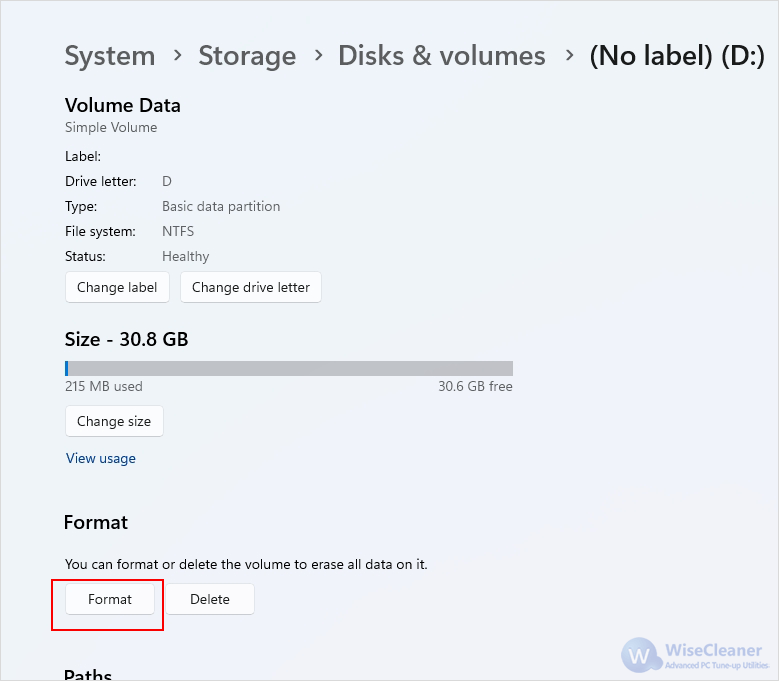
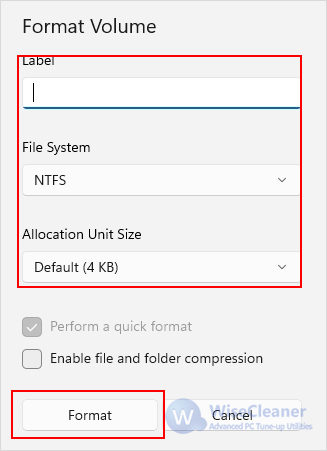
3. Under the Storage section, click Advanced storage settings section then select Disks & volumes. 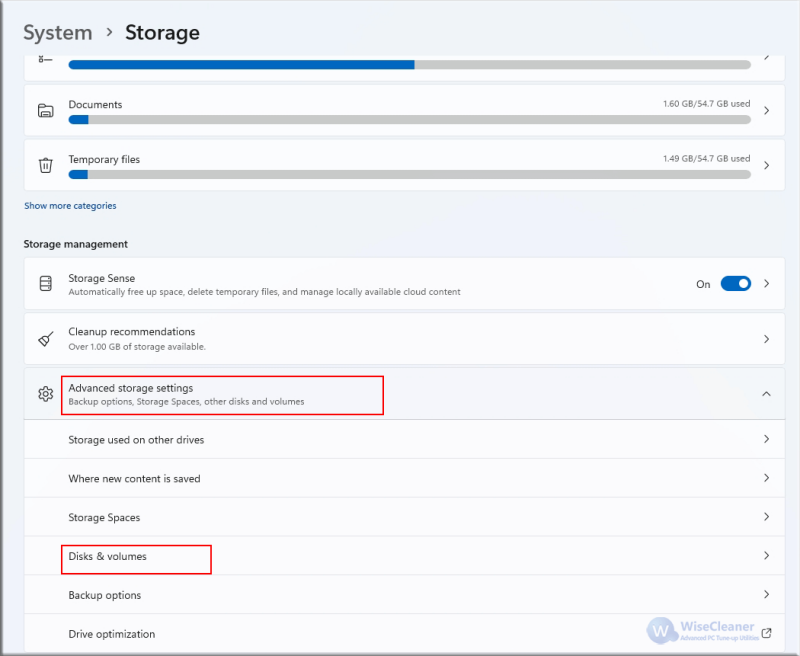
Disk Management is a powerful tool that provides more control over your drives.
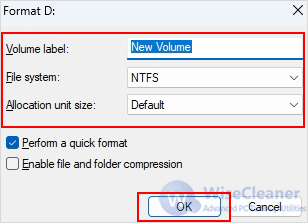
1. Press Win + X and select Disk Management from the menu to open it.
2. Find the drive you want to format. Right-click on the Drive Partition and select Format from the context menu.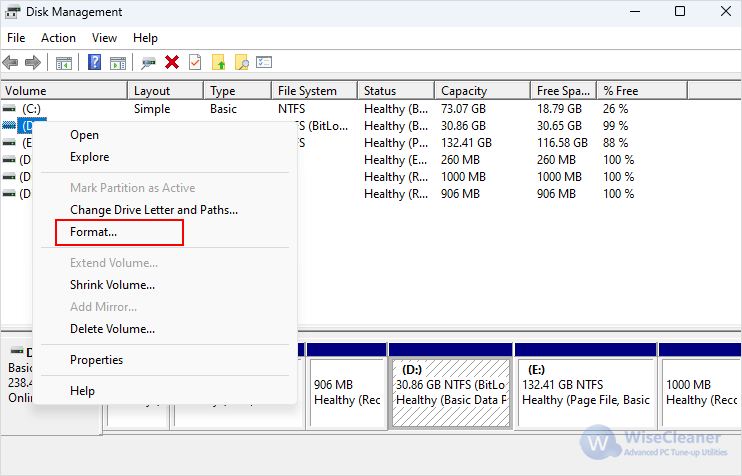
After formatting your hard drive, here are a few additional steps you might want to consider:
Formatting a hard drive on Windows 11 is a straightforward but essential task that ensures your drive is ready for use, whether you're setting up a new drive or repurposing an old one. By following the steps outlined in this guide, you can format your hard drive efficiently. With your drive formatted and ready, you can enjoy improved performance and a fresh start for your storage needs.
wisecleaner uses cookies to improve content and ensure you get the best experience on our website. Continue to browse our website agreeing to our privacy policy.
I Accept


