WiseCleaner Think Tank

Encounter difficult computer problems?
All about maintenance and optimization of your Windows System.

Home > Think Tank > How to Turn Off Microsoft-Verified App in Windows 11

How to Turn Off Microsoft-Verified App in Windows 11

May 28, 2024

Microsoft introduced a new feature in Windows 11 called Microsoft-verified apps, which is designed to ensure the security and authenticity of apps. But if you know the app you're installing isn't a security threat, how do you get around it to install any app you want? In this guide, we'll show you how to turn off Microsoft-verified apps in Windows 11 so you can install apps to your liking.

Method 1: Using the Settings App

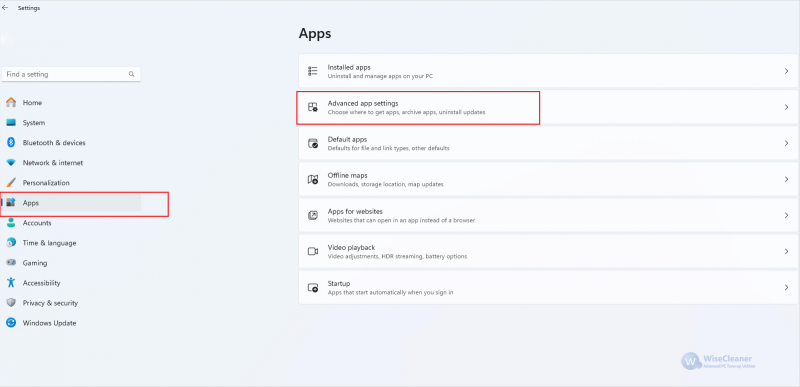
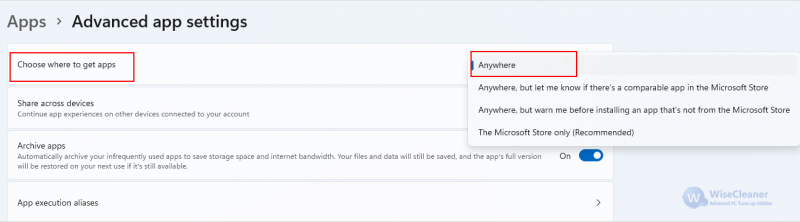
The Settings app provides advanced controls for the operating system and application controls. This is the easiest way to turn off Microsoft-verified apps in Windows 11.

  • Open Settings.
  • Click Apps in the left menu and then click Advanced app settings on the right.
Advanced app settings
  • Expand the drop-down menu next to Choose where to get apps from and select Anywhere.
Choose where to get apps

Method 2: Using the Group Policy Editor

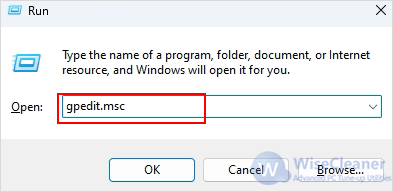
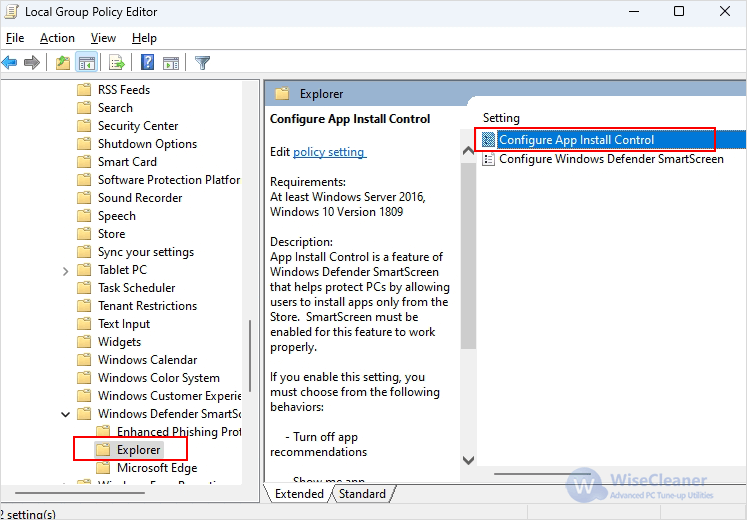
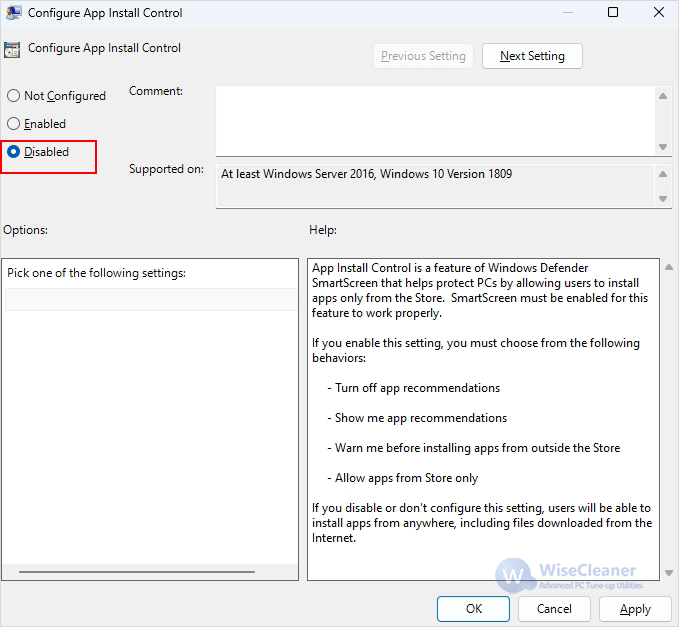
If this is not resolved by Settings, you can use the Group Policy Editor to disable the Microsoft-verified Apps warning.

  • Press Windows+R, then in the Run window, type gpedit.msc, and click OK.
 Open Group Policy Editor
  • Navigate to Computer Configuration > Administrative Templates > Windows Components > Windows Defender SmartScreen > Explorer. Double-click the Configure App Install Control policy on the right.
 Navigate to following path
  • Select Disabled in the pop-up window and click Apply followed by OK.
  click Apply followed by OK

Method 3: Using the Command Prompt

If neither of the above methods works, then you can try using Command Prompt to run specific commands to allow unverified apps.

  • In the Start menu, search for Command Prompt and run it as an administrator.
  • Type the following command and hit Enter.
reg add HKEY_LOCAL_MACHINESOFTWAREMicrosoftWindowsCurrentVersionExplorer /v AicEnabled /t REG_SZ /d Anywhere
 Type the following command

Method 4: Using the Registry Editor

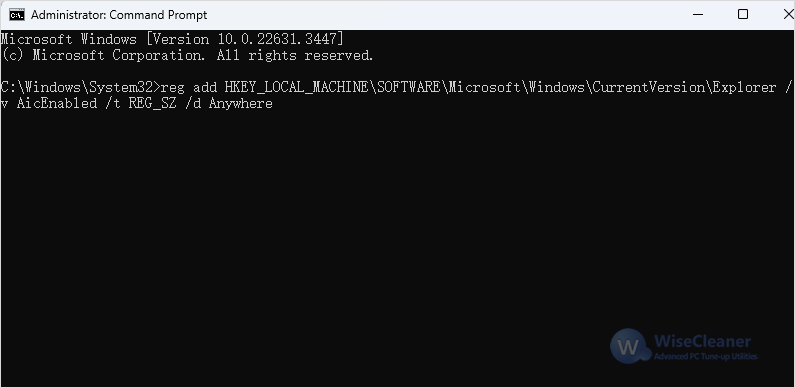
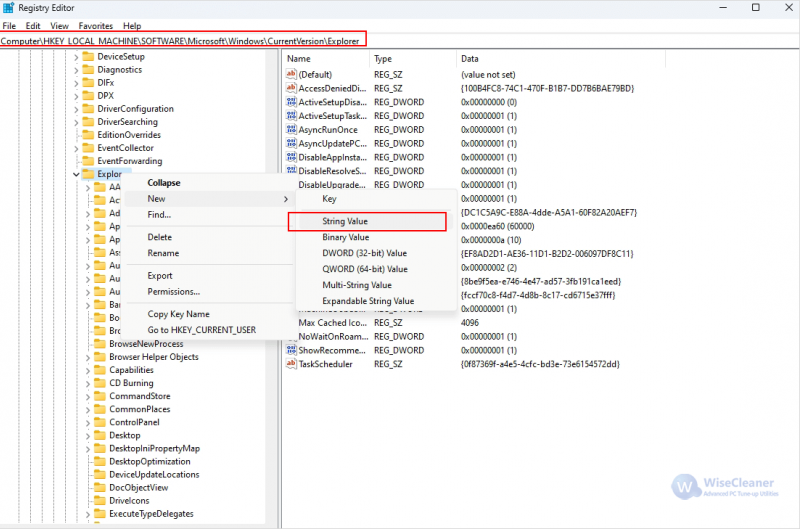
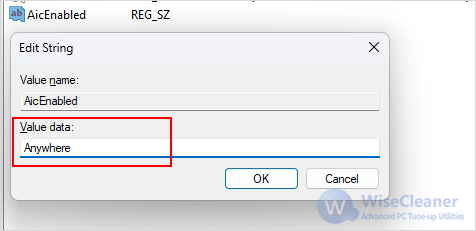
You can also use the Registry Editor to modify the App Install Control permissions. Remember to back up the registry before making any changes.

  • Press the Windows key, type Registry Editor, and click Run as administrator.
  • Navigate to HKEY_LOCAL_MACHINE > SOFTWARE > Microsoft > Windows > CurrentVersion > Explorer.
  • Right-click Explorer, select New > String Value and rename this new value to AicEnabled.
 select New  String Value
  • Double-click AicEnabled, then enter Anywhere in Value data and click OK.
 enter Anywhere in Value data

Conclusion

Turning off Microsoft-verified apps can provide greater flexibility in the installation of apps. You can choose from the four methods mentioned in this article to suit your situation.

Latest
Understanding Windows Power Plans: Balanced, Battery Saver, High Performance, and Ultimate Performance10 Hidden iPhone Features and Tricks You May Not Know About How to Install ADMX and ADML for Microsoft Edge Group Policy Management
Read more >>
Recommend
Understanding Windows Power Plans: Balanced, Battery Saver, High Performance, and Ultimate PerformanceWindows Update Delivery Optimization: How It Works & How to Disable It (2025 Guide)Should I enable or disable Trim of SSD?
Read more >>
Hottest
How to Install a macOS in VMware Workstation PRO 17How to Enable Task Manager Option in Taskbar Menu on Windows 11How to Fix Office Application Error 0xc0000142
Read more >>