WiseCleaner Think Tank

Encounter difficult computer problems?
All about maintenance and optimization of your Windows System.

Home > Think Tank > How to Disable Sleep Mode in Windows 11

How to Disable Sleep Mode in Windows 11

May 17, 2024

Sleep mode is a useful feature on Windows that helps save system power. However, it can also be troublesome if it happens too often or in situations where you don't want it to happen. In this article, we will guide you on how to disable sleep mode on Windows 11.

Method 1: Using Settings App

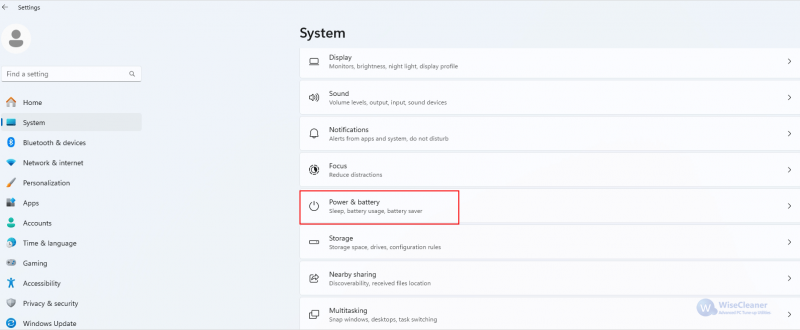
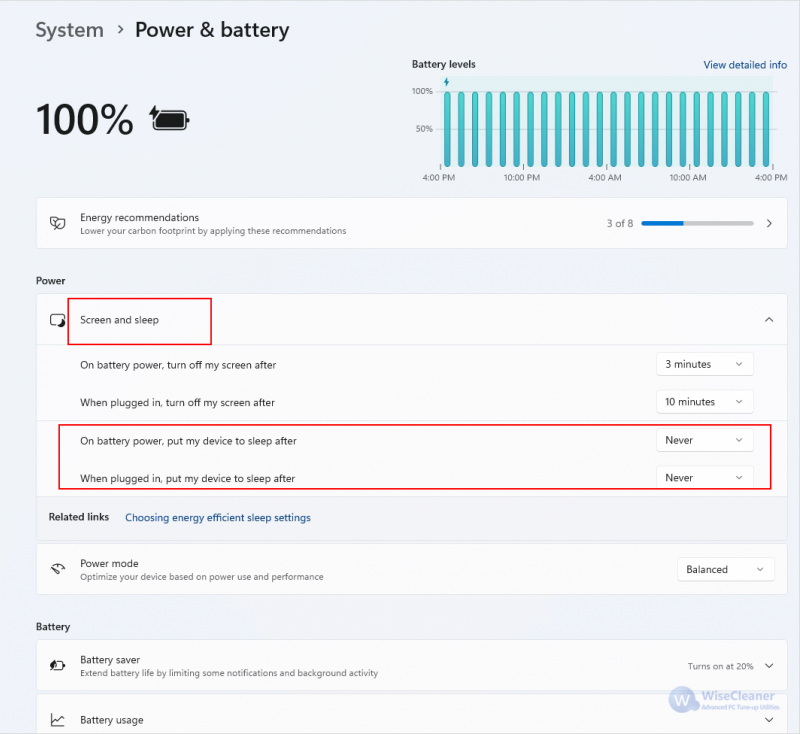
The easiest way to disable sleep mode in Windows 11 is through the Settings app.

  • Open the Settings app and then navigate to the System > Power & battery section.
 Open the Settings app
  • In Power & Battery options, expand the Screen and sleep option. Next, click the drop-down icon next to ‘On battery power, put my device to sleep after’ and choose Never from the list. Similarly, select Never for the ‘When plugged in, put my device to sleep after’ option.
 expand the Screen and sleep option

Method 2: Using Control Panel

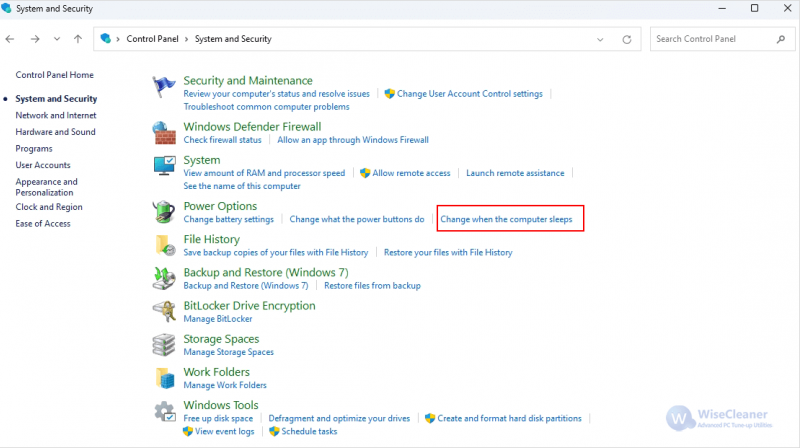
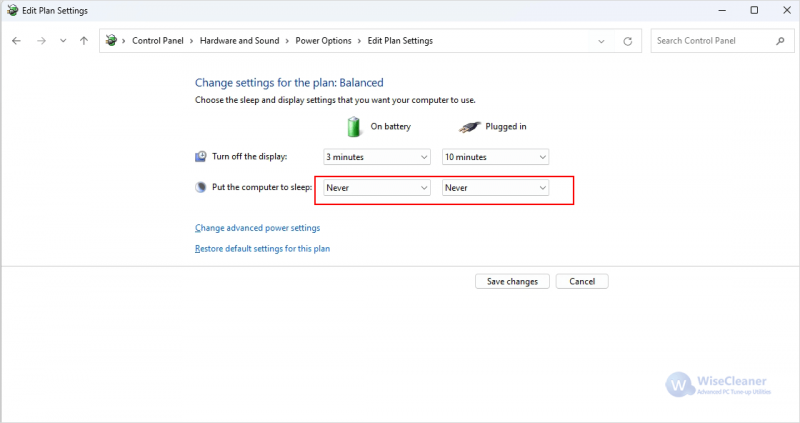
If for some reason you don't want to use the Settings app or are unable to do so, you can also disable Windows 11 sleep mode from the Control Panel.

  • Open the Control Panel.
  • Click on System and Security in Control Panel and then select ‘Change when the computer sleeps’ under Power Options.
 Change when the computer sleeps
  • Set the ‘Put the computer to sleep’ option to Never. Then click Save changes.
 Put the computer to sleep

Method 3: Using Group Policy Editor

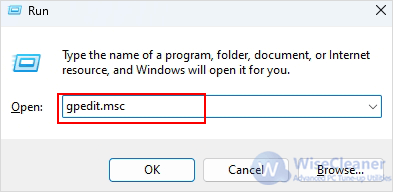
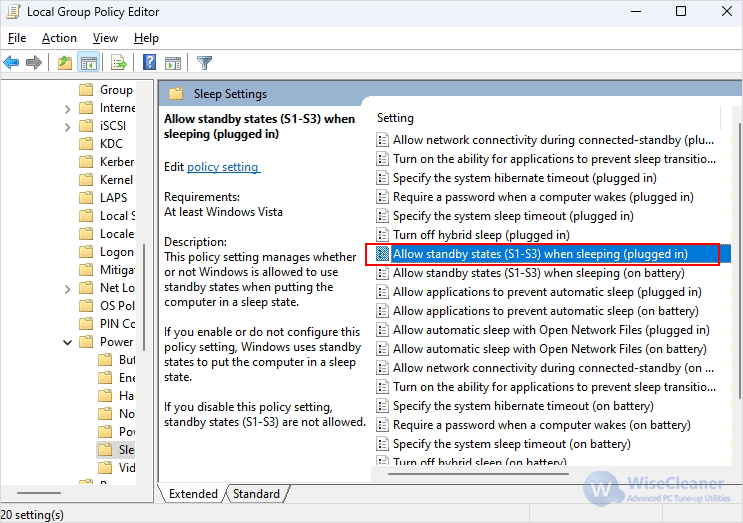
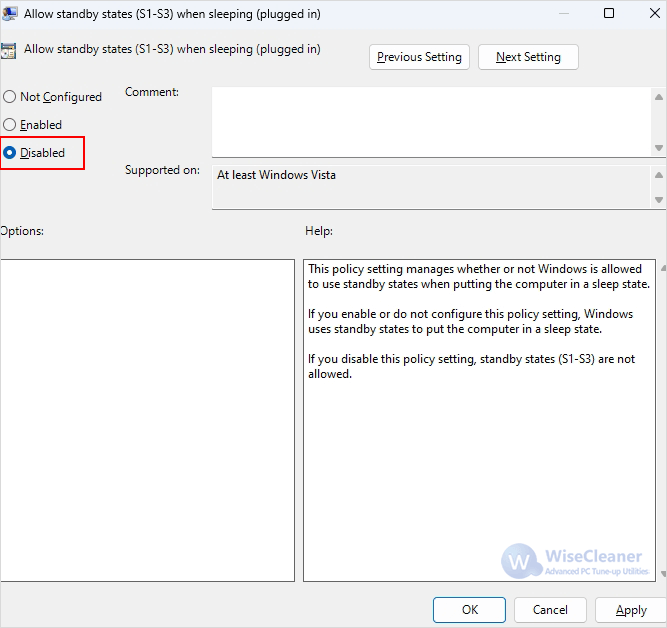
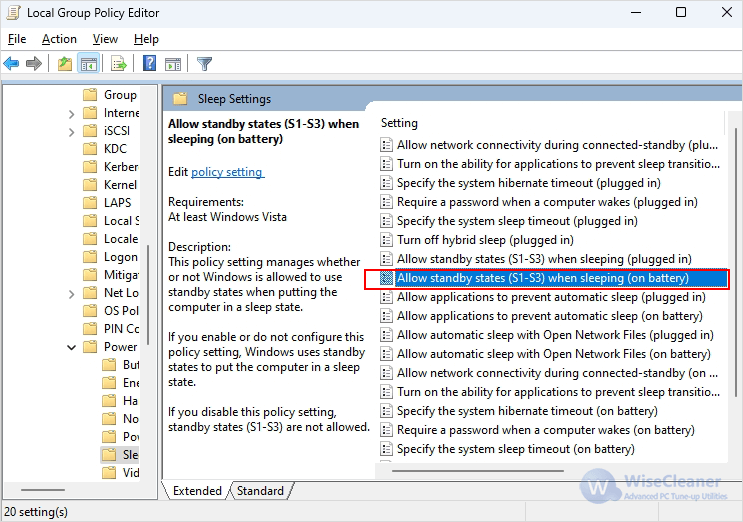
Most Windows behaviors can be intervened through the Group Policy Editor. Therefore, you can use it to change the sleep settings of your computer.

  • Press Windows+R, then in the Run window, type gpedit.msc, and click OK.
 type gpedit.msc
  • Go to Computer Configuration>Administrative Templates>System>Power Management>Sleep Settings. Double-click the ‘Allow standby states (S1-S3) when sleeping (plugged in)’ policy in the expanded menu bar.
 Allow standby states (S1-S3) when sleeping (plugged in)
  • Select Disabled in the pop-up window and click Apply followed by OK.
 Select Disabled
  • Return to the previous menu and repeat the above steps for the ‘Allow the stand states (S1-S3) when sleeping (On battery)’ policy.
 repeat the above steps

Method 4: Using Registry Editor

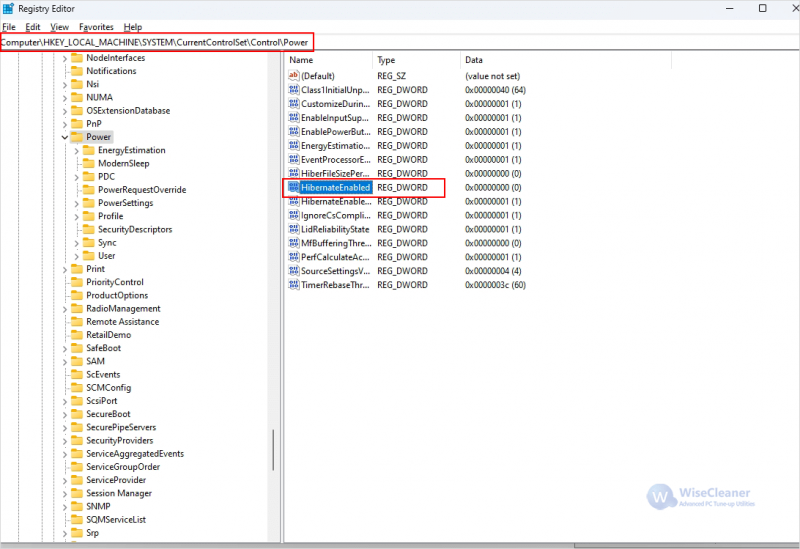
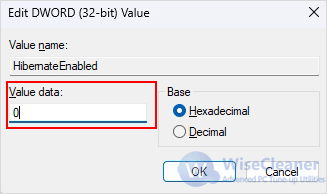
You can also use the Registry Editor if the above methods do not achieve the desired results. But before that, we recommend you to backup Windows registry.

  • Press the Windows key, type Registry Editor, and click Run as administrator.
  • Go to HKEY_LOCAL_MACHINE>SYSTEM>CurrentControlSet>Control>Power and then double-click the HibernateEnabled.
 HibernateEnabled
  • This opens the Edit DWORD Value box. Change the value to 0 to disable hibernation mode and click OK.
 Change the value to 0

Conclusion

In conclusion, disabling sleep mode can enhance your computing experience by ensuring that your computer stays active. With the methods described in this article, you can easily change your computer's sleep settings to suit your needs.

 
Latest
Understanding Windows Power Plans: Balanced, Battery Saver, High Performance, and Ultimate Performance10 Hidden iPhone Features and Tricks You May Not Know About How to Install ADMX and ADML for Microsoft Edge Group Policy Management
Read more >>
Recommend
Understanding Windows Power Plans: Balanced, Battery Saver, High Performance, and Ultimate PerformanceWindows Update Delivery Optimization: How It Works & How to Disable It (2025 Guide)Should I enable or disable Trim of SSD?
Read more >>
Hottest
How to Install a macOS in VMware Workstation PRO 17How to Enable Task Manager Option in Taskbar Menu on Windows 11How to Fix Office Application Error 0xc0000142
Read more >>