WiseCleaner Think Tank
Encounter difficult computer problems?
All about maintenance and optimization of your Windows System.
Feb 23, 2023
We all have names. So do the pets, toys or even our cars. Can we name our computers, too? Yes, we can. There may already have been a random name with letters and special characters provided by Windows when the time the computer was first installed and the computer was set up. But users can rename it at any time to help them distinguish from others.
The name of a PC can be seen in Windows Settings, the greeting page when sign-in as well as Windows Explorer, etc. Here we will list the best ways to rename your PC on the Windows 11 system. So stay with us to have your own customized PC name.
You can use Power User Menu to open Settings. Press Windows logo on the keyboard + X, and then press N to open Windows Settings. Here are more about how to use Power User Menu to open Windows programs.
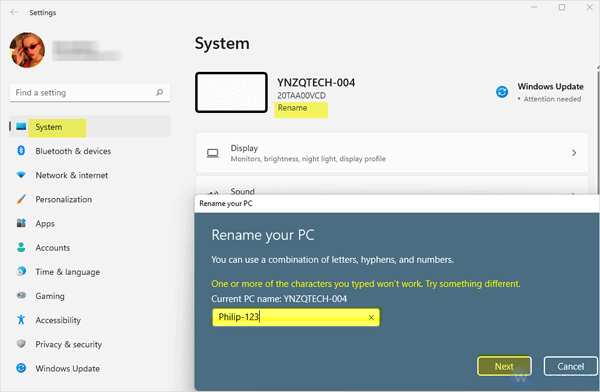
On the window that pops up, you will see System tab opened by default. Your PC’s name is under System. There are two lines of fine print below the name.
To access to the page of Rename, you can also open Settings and navigate to System - About - Rename this PC.
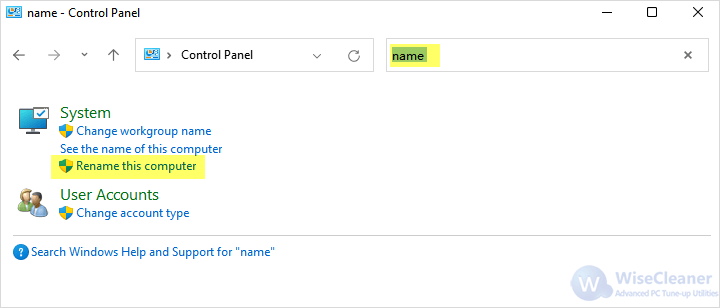
Double-click the shortcut of Control Panel from the desktop. If you cannot find Control Panel on your Windows 11, please view How to open Control Panel. Type and search name in its search box.
From the results, you should see Rename this computer under System, click on it.
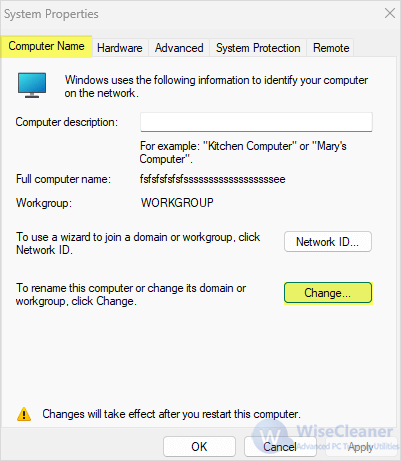
By doing so, System Properties will be opened. Choose the first tab, Computer Name. Click on Change.
This will pop up a new window, and there you can see a open field in the box of Computer name. Type the new name of your PC in the open field, and click on OK.
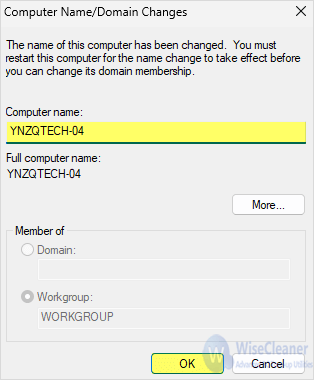
Noted: renaming a PC will only take effect after restarting the PC in these two methods.
After rebooting the PC, you will first find the name on the greeting page has been changed. If you have problems in using Windows PC, access to WiseCleaner Think Tank, a place with all tips to maintain and optimize the Windows system.
wisecleaner uses cookies to improve content and ensure you get the best experience on our website. Continue to browse our website agreeing to our privacy policy.
I Accept


